Who doesn't love a classic Twix bar? That perfect trifecta of crunchy biscuit, chewy caramel, and rich milk chocolate is a timeless treat. Now, imagine transforming those beloved flavors into a creamy, dreamy homemade ice cream. Yes, you read that right – DIY Twix ice cream is not only possible but incredibly easy to make right in your own kitchen! Forget the long queues at the ice cream parlor or the quest for that elusive store-bought flavor. We're about to dive into a simple, no-churn recipe that promises to deliver all the iconic taste of a Twix bar, transformed into a scoopable, frosty delight. Get ready to impress your taste buds and your friends with this ultimate dessert that brings the candy bar experience to a whole new level.
The Irresistible Allure of Homemade Twix Ice Cream
There's something uniquely satisfying about crafting your favorite treats from scratch, and homemade Twix ice cream is no exception. Beyond the sheer joy of a delicious dessert, making your own offers several compelling advantages:
- Unmatched Freshness: Store-bought ice creams, while convenient, often contain preservatives and stabilizers. Your homemade version will be made with fresh, high-quality ingredients, resulting in a purer, more vibrant flavor.
- Total Customization: Love extra caramel? Want more biscuit crunch? Making your own allows you to control the ratio of Twix bar components, ensuring every spoonful is tailored to your exact preferences. You can even experiment with dark chocolate Twix or white chocolate Twix for different flavor profiles.
- Budget-Friendly Indulgence: While a premium pint of ice cream can be costly, the ingredients for a no-churn Twix ice cream are surprisingly affordable, offering a gourmet experience without breaking the bank.
- Fun & Rewarding Activity: The process itself is enjoyable! It's a fantastic activity for a quiet afternoon, a weekend project with kids, or a unique way to surprise guests with a dessert they won't soon forget. There's immense satisfaction in creating something so delicious with your own hands.
- No Special Equipment Needed: Unlike traditional ice cream recipes that demand an ice cream maker, our no-churn method is incredibly simple, requiring only a hand mixer or stand mixer, and a freezer-safe container. This makes homemade twix ice cream accessible to everyone.
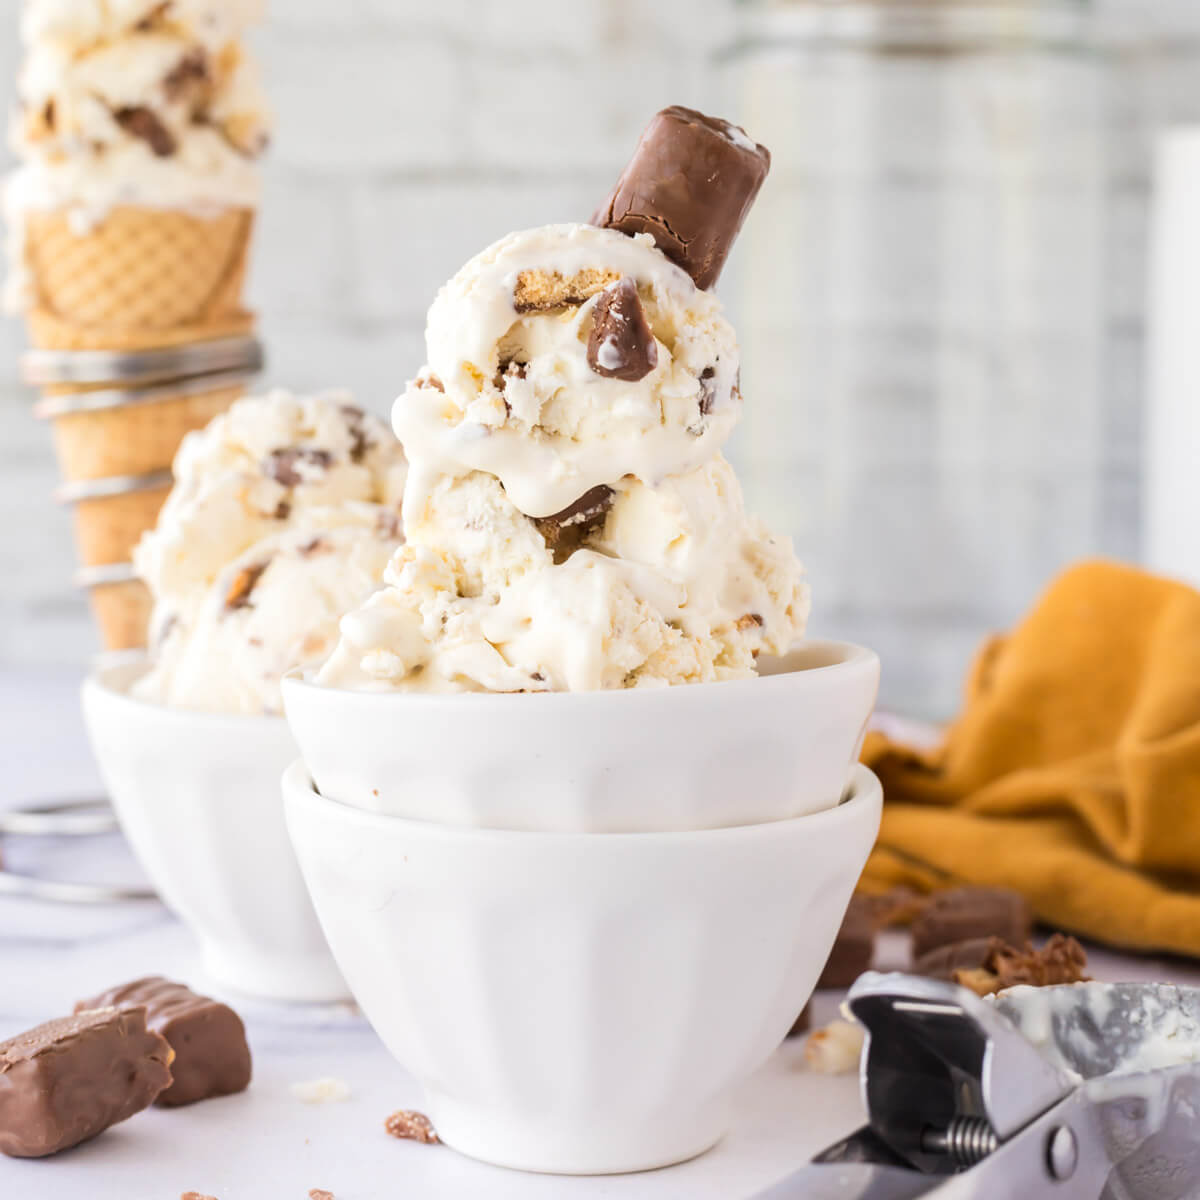
The combination of smooth, creamy ice cream, chewy caramel swirls, crisp shortbread pieces, and shards of milk chocolate creates a textural symphony that truly captures the essence of the beloved Twix bar. It's an experience that rivals, and often surpasses, its candy bar counterpart in terms of sheer decadent pleasure. Some might even argue that the ice cream form provides a more cohesive and enjoyable way to consume the classic flavors, making you wonder, Twix Ice Cream vs. Candy Bar: Which Is Better?
Essential Ingredients & Equipment for Your No-Churn Masterpiece
One of the best things about this Twix ice cream recipe is its simplicity. You don't need exotic ingredients or specialized machinery. Here's what you'll gather to create your own frozen delight:
Key Ingredients:
- Heavy Cream (2 cups / 470ml): This is the foundation of your no-churn ice cream, providing the rich, creamy texture. Ensure it's very cold for optimal whipping.
- Sweetened Condensed Milk (1 can, 14 oz / 397g): This sweetens and thickens the ice cream base, eliminating the need for an ice cream machine.
- Vanilla Extract (1-2 teaspoons): A dash of vanilla enhances all the other flavors. Use good quality extract for the best results.
- Twix Bars (approximately 6-8 standard bars): The star of the show! You'll want enough to chop and fold into the ice cream, plus a little extra for topping.
- Optional: Caramel Sauce (1/4 - 1/2 cup): For extra caramel swirls and to intensify the Twix flavor. Use a good quality store-bought sauce or make your own.
- Optional: Shortbread Cookies (2-3, crushed): If you want to boost the biscuit crunch even further, a few crushed shortbread cookies can do wonders.
Equipment You'll Need:
- Large Mixing Bowl: Preferably chilled in the freezer for 15-20 minutes before use, as this helps the cream whip up faster and firmer.
- Electric Mixer (Handheld or Stand Mixer): Essential for whipping the heavy cream to stiff peaks.
- Rubber Spatula: For gently folding ingredients together.
- Loaf Pan (9x5 inch) or Other Freezer-Safe Container: The ideal vessel for freezing your ice cream. Glass or metal containers work best as they conduct cold efficiently.
- Sharp Knife and Cutting Board: For chopping your Twix bars.
- Plastic Wrap or Lid: To cover your container during freezing.
Your Step-by-Step Guide to Crafting Perfect Twix Ice Cream
Ready to turn simple ingredients into an extraordinary treat? Follow these easy steps to make your very own Twix ice cream:
- Prepare Your Twix Bars: Unwrap all your Twix bars. Place them on a cutting board and chop them into small, bite-sized pieces. Aim for varying sizes – some smaller for flavor distribution, and some slightly larger for distinct chewy bits. Set aside a small amount for garnishing later, if desired.
- Chill Your Bowl (Optional but Recommended): Place your large mixing bowl and the whisk attachment (if using a stand mixer) or beaters (for a hand mixer) into the freezer for 15-20 minutes. A cold bowl helps the heavy cream whip up more efficiently and hold its volume.
- Whip the Heavy Cream: Pour the very cold heavy cream into your chilled mixing bowl. Using your electric mixer on medium-high speed, whip the cream until it forms stiff peaks. This means when you lift the beaters, the cream stands up firmly. Be careful not to over-whip, or it will turn grainy.
- Gently Fold in Sweetened Condensed Milk and Vanilla: Pour the entire can of sweetened condensed milk into the whipped cream. Add the vanilla extract. Using your rubber spatula, gently fold the mixture together until just combined. Be careful not to deflate the whipped cream; the goal is to maintain as much air as possible for a light, airy texture.
- Incorporate the Twix Pieces and Caramel (Optional): Add about two-thirds of your chopped Twix pieces into the ice cream base. If using, drizzle in about half of your caramel sauce. Gently fold these ingredients into the mixture until evenly distributed. Don't overmix; a few swirls of caramel are lovely.
- Transfer to Freezer Container: Pour half of your Twix ice cream mixture into your prepared loaf pan or freezer-safe container. Sprinkle with some of the remaining chopped Twix and drizzle with a little more caramel sauce (if using). Add the rest of the ice cream mixture, then top with the remaining Twix pieces and a final swirl of caramel sauce.
- Freeze Until Solid: Cover the container tightly with plastic wrap or a lid. Place it in the freezer for at least 6-8 hours, or preferably overnight, until the Twix ice cream is firm and scoopable.
Tips for Customizing & Perfecting Your Homemade Twix Treat
While the basic recipe for DIY Twix ice cream is undeniably delicious, there's always room for personal touches and techniques to ensure perfection:
Customization Ideas:
- Double the Caramel: If you're a true caramel lover, don't be shy! Swirl in extra caramel sauce during layering, or even add a tablespoon or two directly into the cream mixture before folding in the Twix. A sprinkle of sea salt can also elevate the caramel flavor beautifully.
- Chocolate Boost: For those who crave more chocolate, consider folding in a handful of mini chocolate chips or finely chopped milk chocolate along with the Twix pieces. A drizzle of chocolate fudge sauce on top before freezing adds another layer of indulgence.
- Biscuit Bonanza: To enhance the cookie crunch, crush a few extra shortbread cookies (or even digestive biscuits) and layer them into the ice cream. This mimics the biscuit layer of a Twix bar perfectly.
- Twix Variations: Don't limit yourself to classic Twix! Try this recipe with Twix Peanut Butter or Twix Cookie Dough for exciting new flavor combinations.
- Spice It Up: A pinch of cinnamon or a tiny dash of espresso powder can subtly enhance the chocolate and caramel notes without overpowering the core Twix flavor.
Pro Tips for Perfection:
- Use Cold Ingredients: Ensure your heavy cream is straight from the fridge when you start. This is crucial for achieving stiff peaks and a stable ice cream base.
- Don't Overmix: When folding in the condensed milk and Twix pieces, use a gentle hand. Overmixing will deflate the whipped cream, leading to a denser, less airy ice cream.
- Freeze in a Shallow Container: A wider, shallower container will help your ice cream freeze more evenly and quickly, reducing the chance of ice crystals forming.
- Prevent Ice Crystals: A tightly sealed container is key. Air exposure is the enemy of creamy ice cream. Press plastic wrap directly onto the surface of the ice cream before putting on the lid, or ensure the lid is airtight.
- Softening Before Serving: For the best scoopability, remove your homemade Twix ice cream from the freezer about 5-10 minutes before serving. This allows it to soften slightly, making it easier to scoop and enhancing its creamy texture.
- Storage: Homemade ice cream is best enjoyed within 1-2 weeks. After that, its texture may begin to degrade due to ice crystal formation, though it will remain safe to eat for longer.
By following these tips, you'll be able to create a consistently delicious and perfectly textured batch of homemade Twix ice cream every time, truly capturing the magic of the candy bar in a frozen form.
Indulging in homemade Twix ice cream is more than just enjoying a dessert; it's an experience of culinary creativity and sweet satisfaction. This easy, no-churn recipe proves that you don't need fancy equipment or a professional pastry chef's skills to create something truly spectacular. With just a few simple ingredients and a little bit of patience, you can whip up a batch of creamy, caramel-swirled, cookie-crunchy goodness that will delight everyone who tries it. So go ahead, gather your ingredients, follow our steps, and prepare to elevate your dessert game with this irresistible DIY treat. Your taste buds will thank you!
